FitMesh Sync

Android step-by-step guide

Android Setup: Health Connect and first sync

Detailed guide with verified screenshots to configure Health Connect, verify your wearable companion app, and start syncing with FitMesh Sync.

Note on test environment and reference screenshots:The screenshots in this guide were captured on a Google Pixel 6 emulator running Android 14 (API 34) with FitMesh QA app 3.9.9+190 and system interface in Italian locale, not on a physical phone or with live third-party wearable accounts attached. Settings and paths accurately reflect Android 14. For clarity, actions and descriptions below indicate both the English term and the corresponding Italian interface label visible in the images (such as «Autorizzazioni app» for App permissions and «Sincronizza ora» for Sync now).

Wearable sync data flow via Health Connect

1. Your smartwatch or tracker sends data to its official companion app (e.g., Samsung Health, Garmin Connect, Zepp, Google Fit, Withings, Oura).

2. The companion app writes supported metrics into Android Health Connect on your phone.

3. FitMesh Sync reads from Health Connect and computes your dashboard trends in the app.

1. Find and open Health Connect

Action: Open Android Settings, tap Security & privacy, scroll down to Privacy, and tap Health Connect («Connessione Salute»).

Expected result: The Health Connect main screen opens showing «Manage app access to health data» («Gestisci l'accesso delle app ai dati sulla salute»).
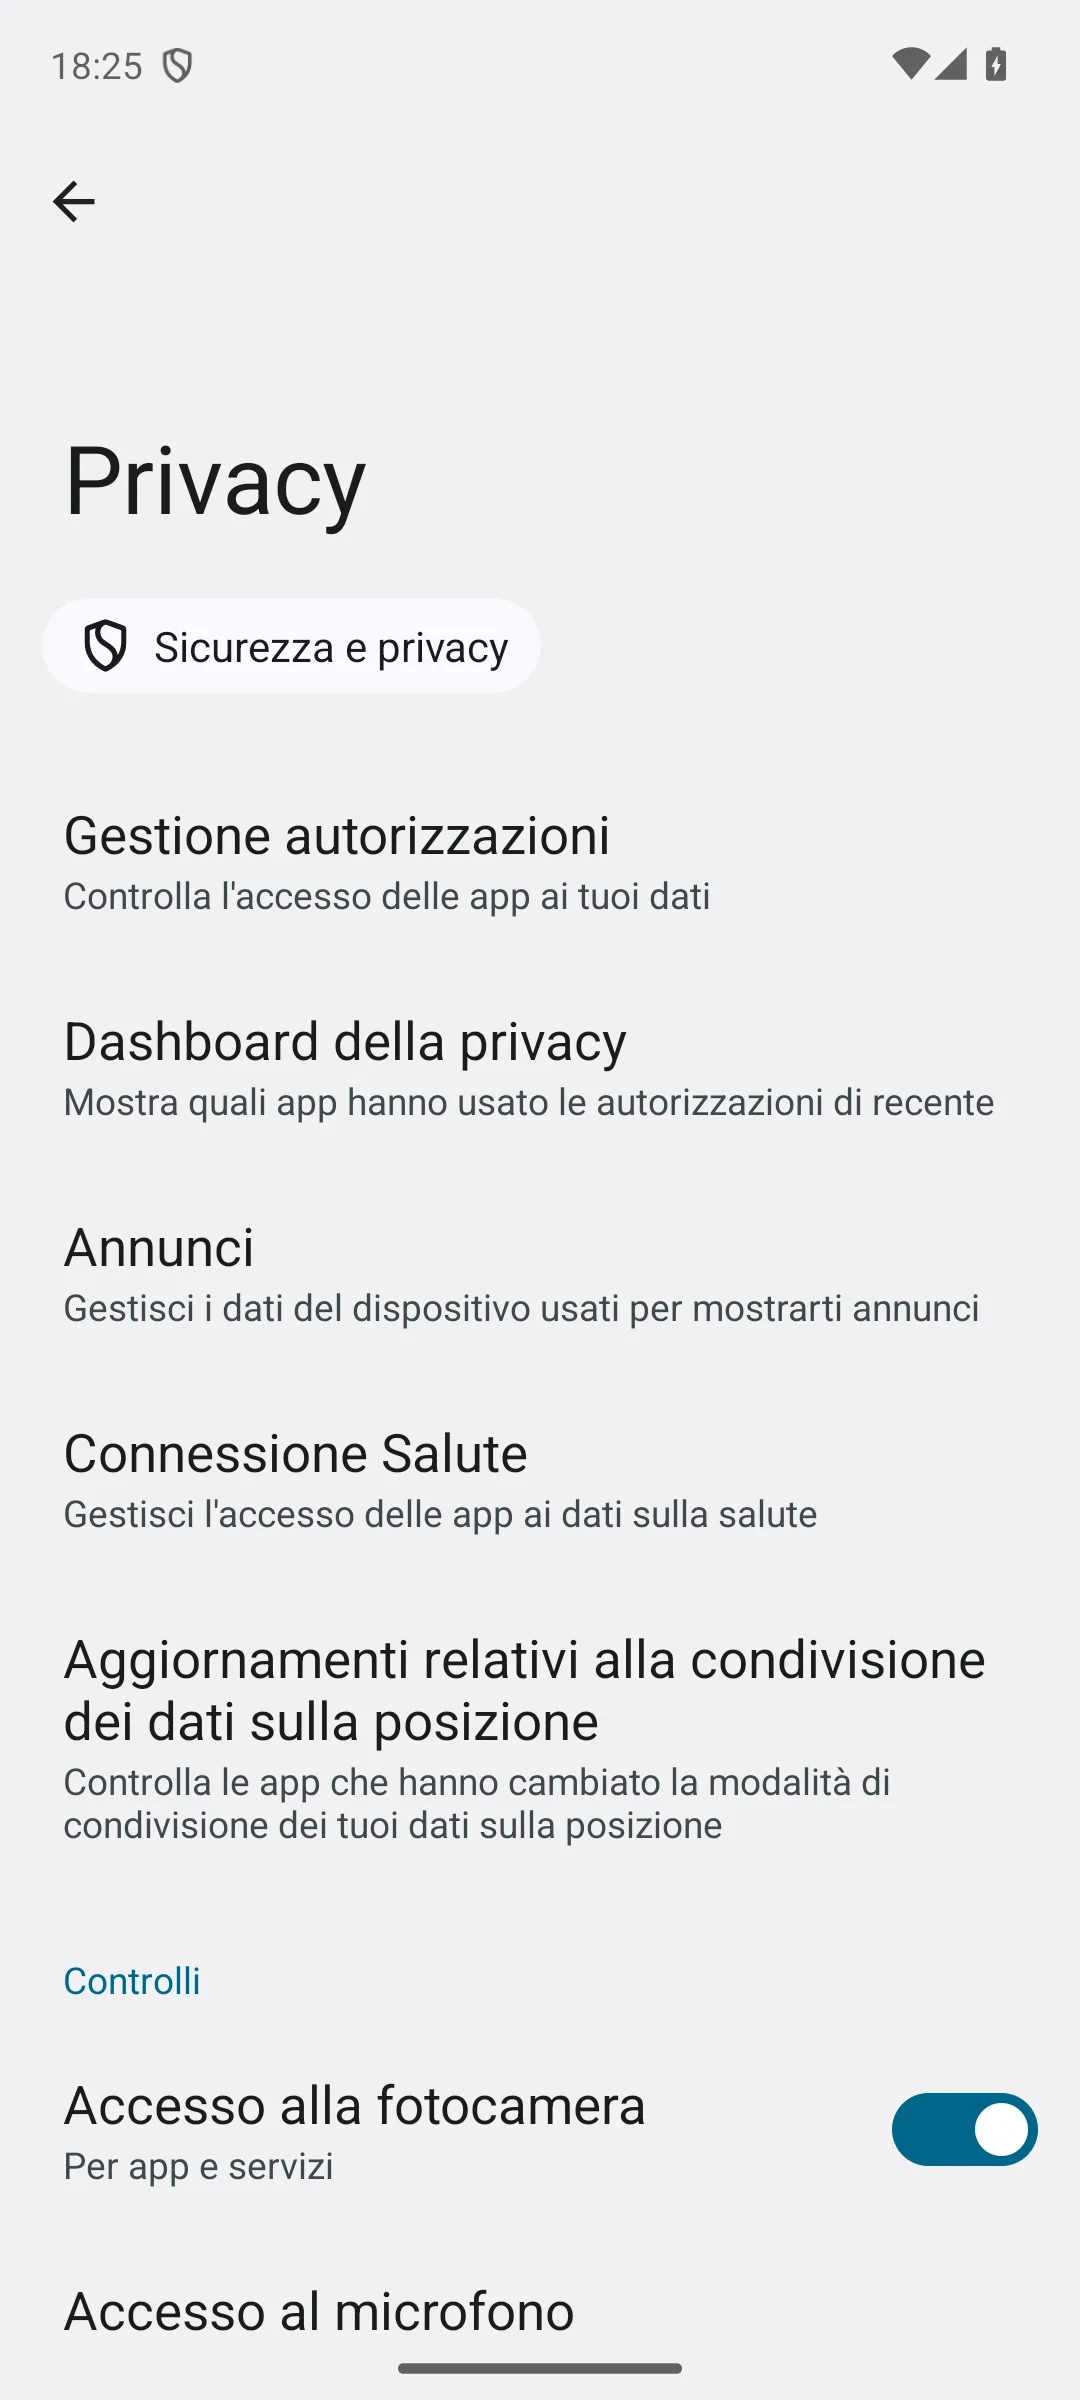
Android 14 Settings screen showing Health Connect under Privacy section
System path: Settings > Security & privacy > Privacy > Health Connect. (Reference device running Italian system locale).
What to check if something goes wrong:On Android 14 or newer, Health Connect is built into system settings. On Android 9-13, install the standalone Health Connect app from Google Play Store. On Samsung Galaxy smartphones, this menu may also appear under Settings > Security & privacy > Health Connect or inside Samsung Health settings.

2. Open app permissions

Action: On the Health Connect home screen, tap App permissions («Autorizzazioni app») to inspect which applications request health data access.

Expected result: You see the list of applications, split into allowed and not allowed categories.
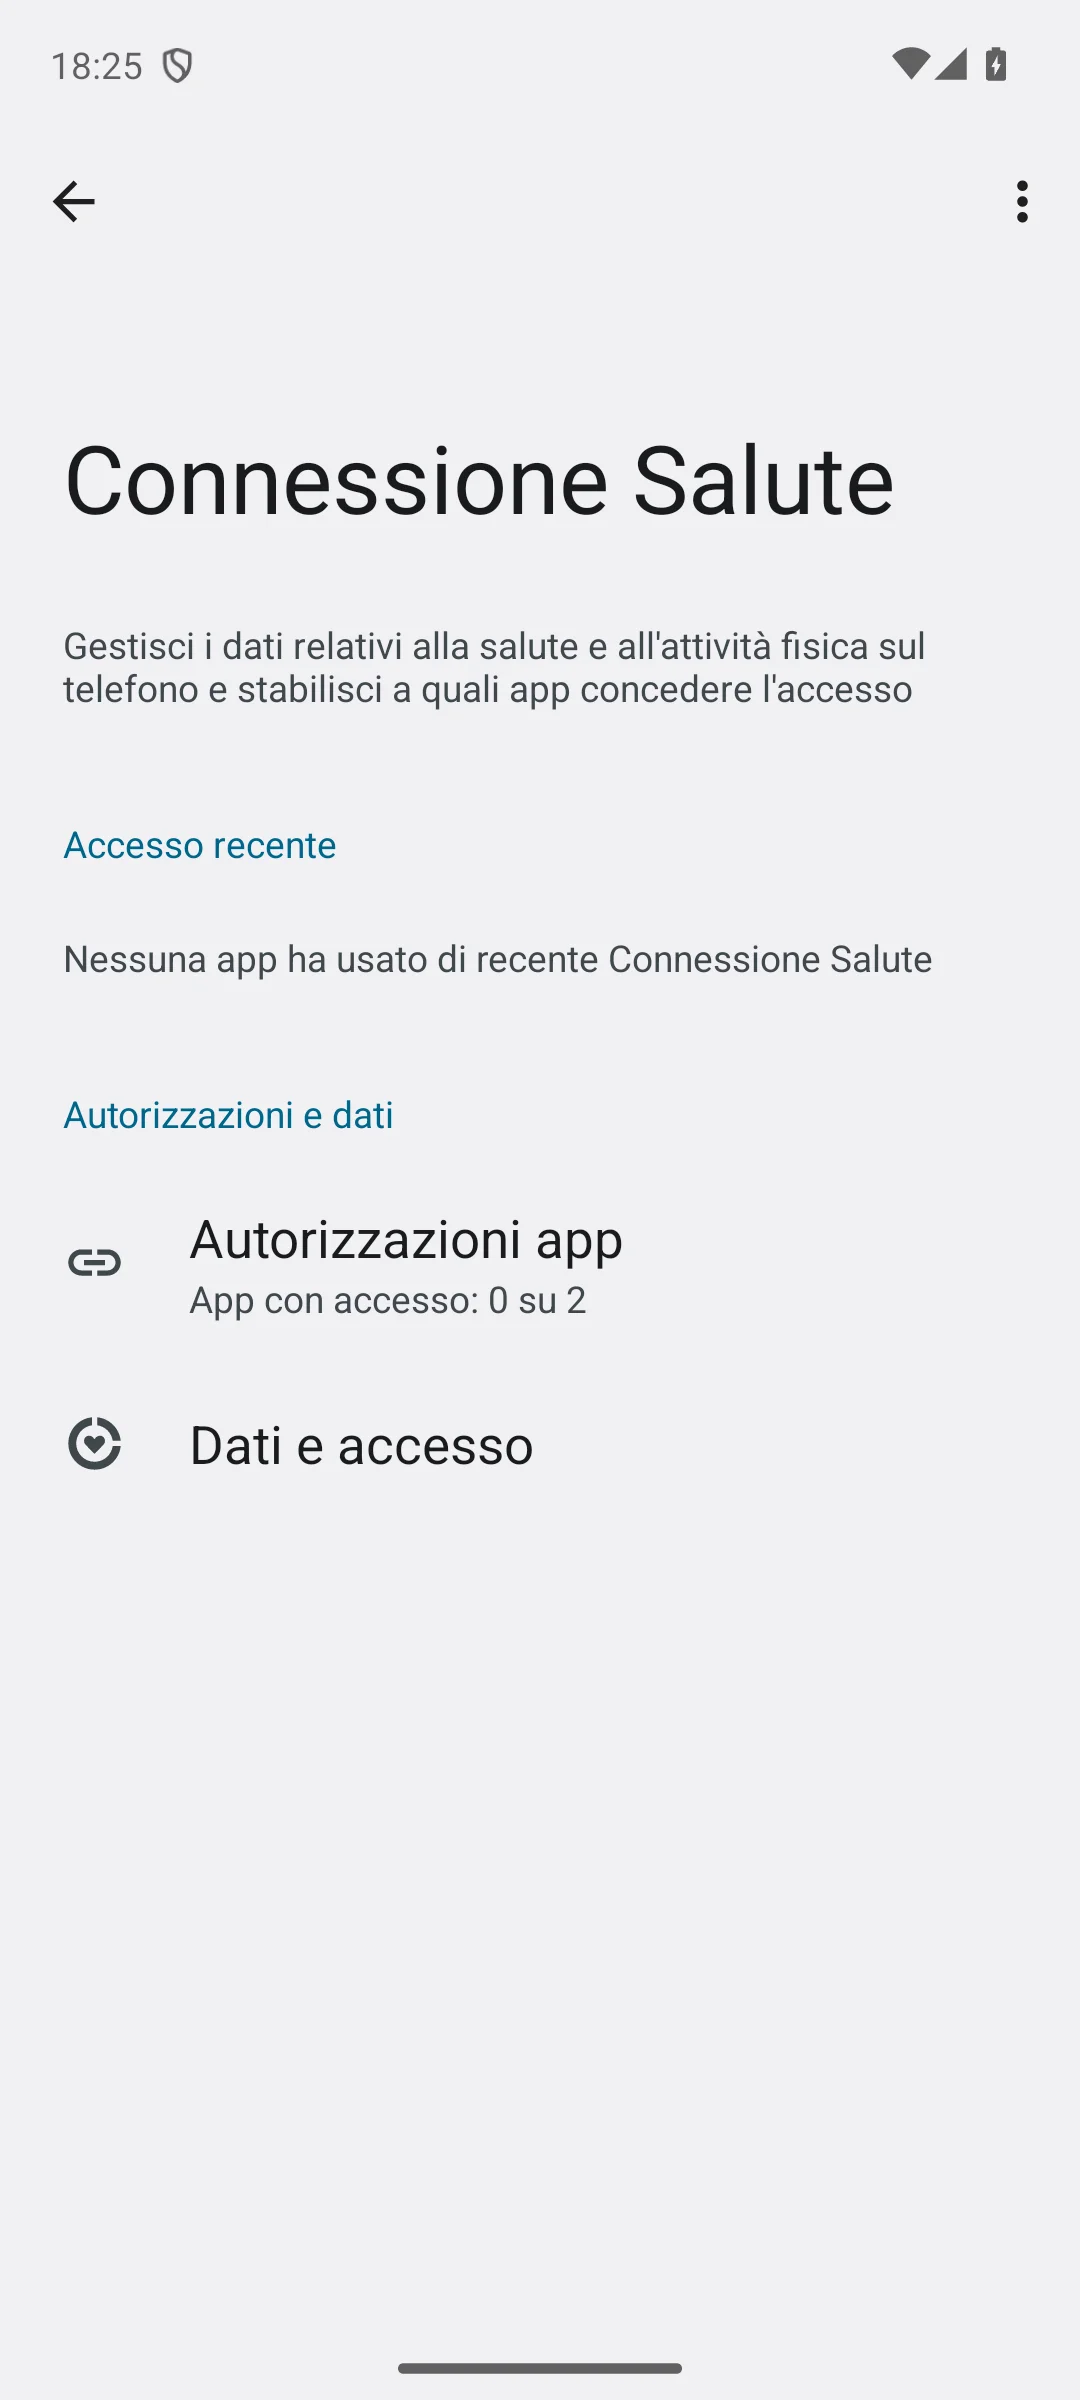
Health Connect home screen displaying App permissions section
Health Connect home screen displaying connected app count. (Italian interface: «Autorizzazioni app»).
What to check if something goes wrong:If no apps are listed, verify that both your wearable companion app and FitMesh Sync are installed on this phone.

3. Verify your wearable companion app writes health data

Notice on demo data:The screenshots show demo data; importing data from a real device is not illustrated in this guide.

Action: Open your smartwatch or tracker companion app (e.g., Samsung Health, Garmin Connect, Zepp, Withings, Oura) and ensure sync to Health Connect is turned on in its settings. In Health Connect, you can inspect categories under Data & access > Browse data («Dati e accesso > Sfoglia i dati»).

Expected result: Your companion app writes supported metrics to the shared repository. Note: available metrics depend on the source app and hardware model; not all vendors support or write the full set of metrics (steps, heart rate, sleep, calories, distance).
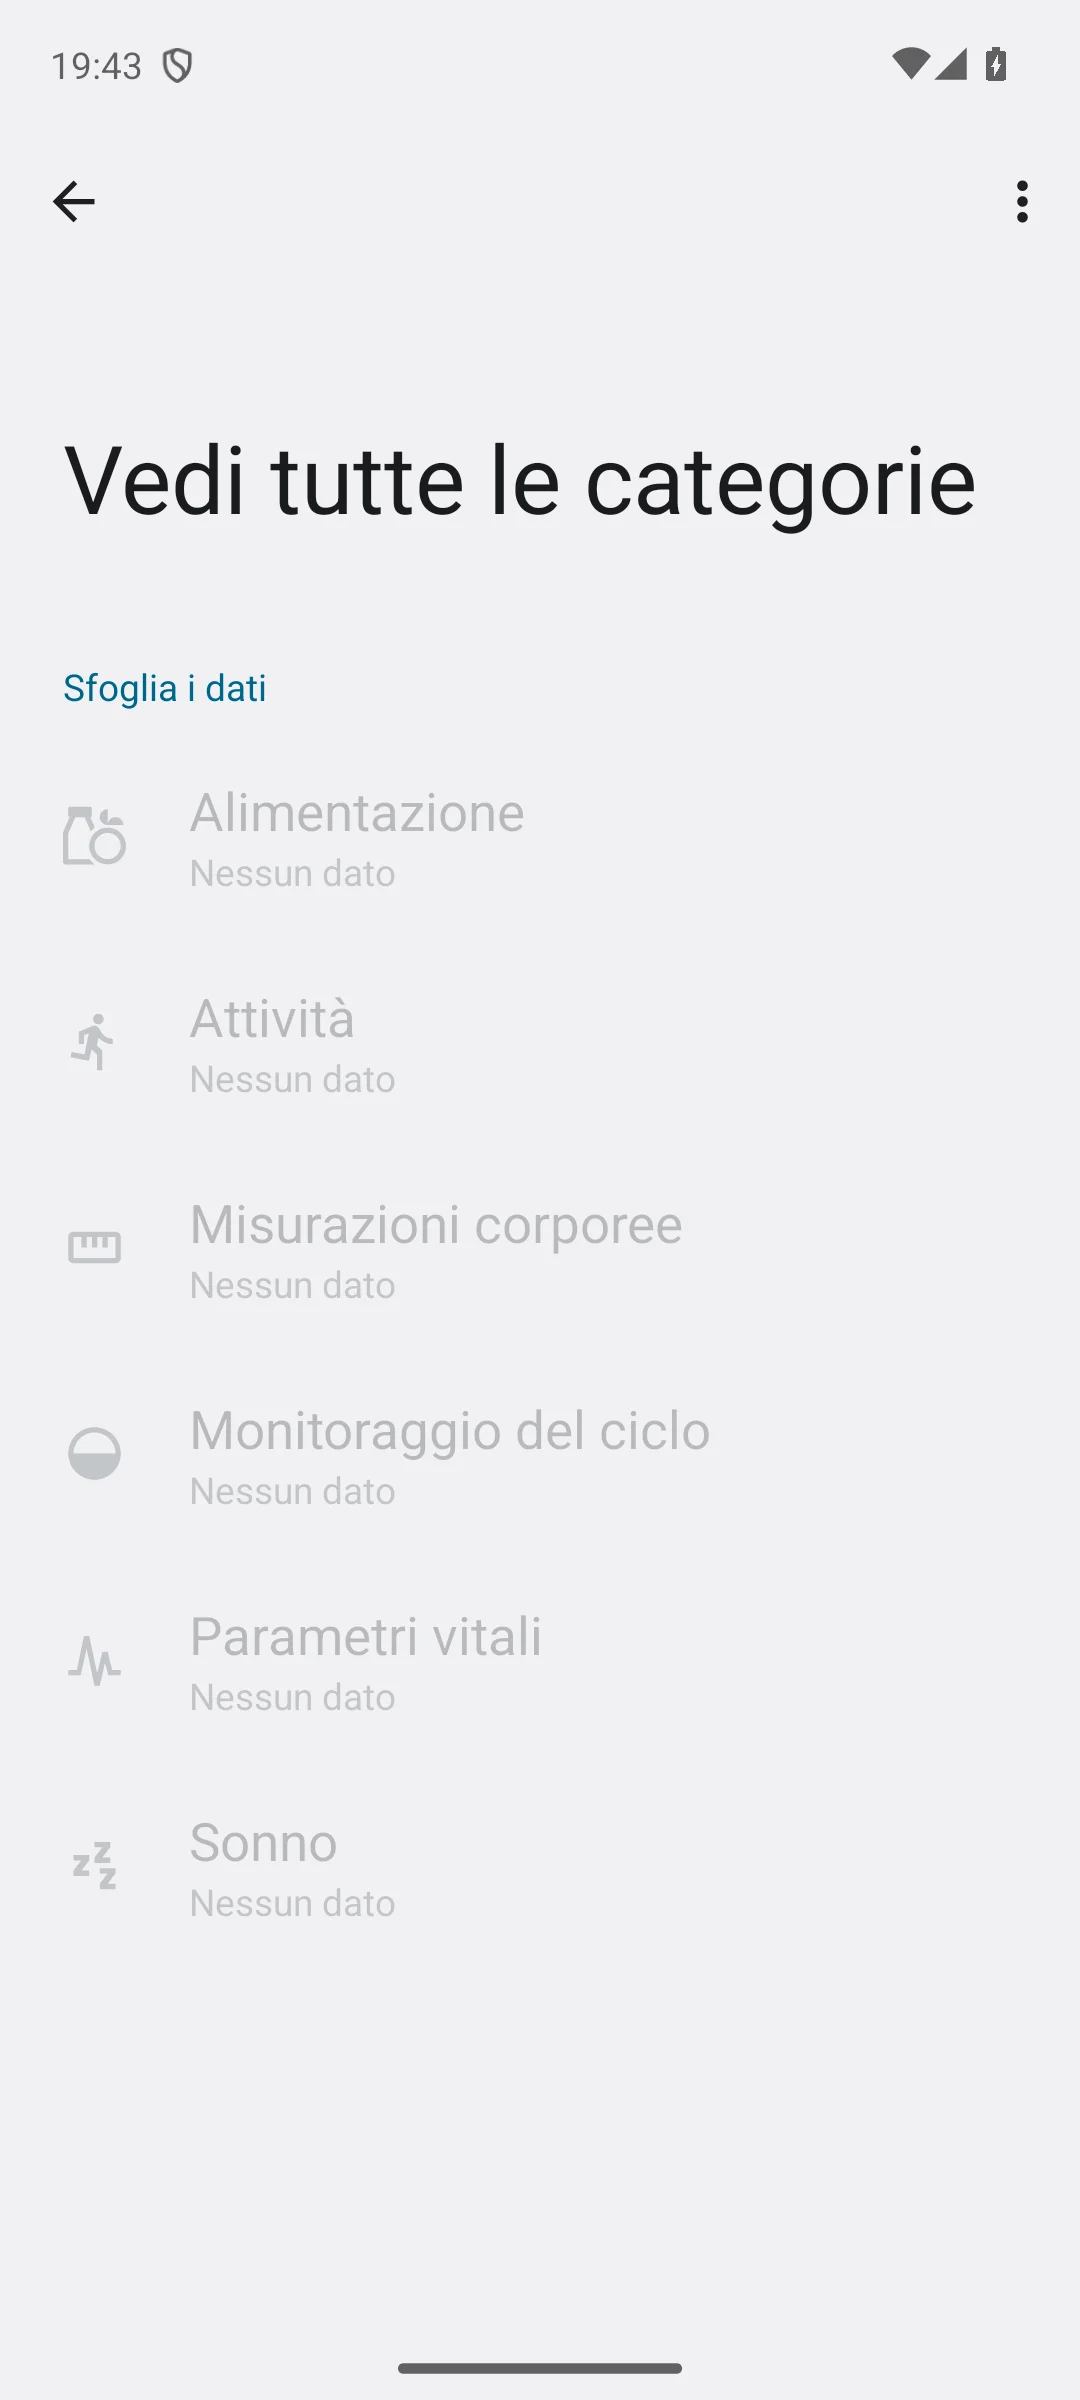
Health Connect Browse data screen showing categories with No data state
Health Connect Browse data screen showing «Nessun dato» (No data) before a companion app writes records. Companion write configuration varies by vendor.
What to check if something goes wrong:If a category shows «Nessun dato» (No data), it simply indicates that no records are currently available for that category in Health Connect. Open your wearable companion app and trigger a sync from the device to the phone to verify data is being shared.

4. Select FitMesh Sync from the app list

Action: Return to the App permissions screen and select FitMesh Sync, initially located under the Not allowed section («Accesso non consentito»).

Expected result: The dedicated permission configuration screen for FitMesh Sync opens.
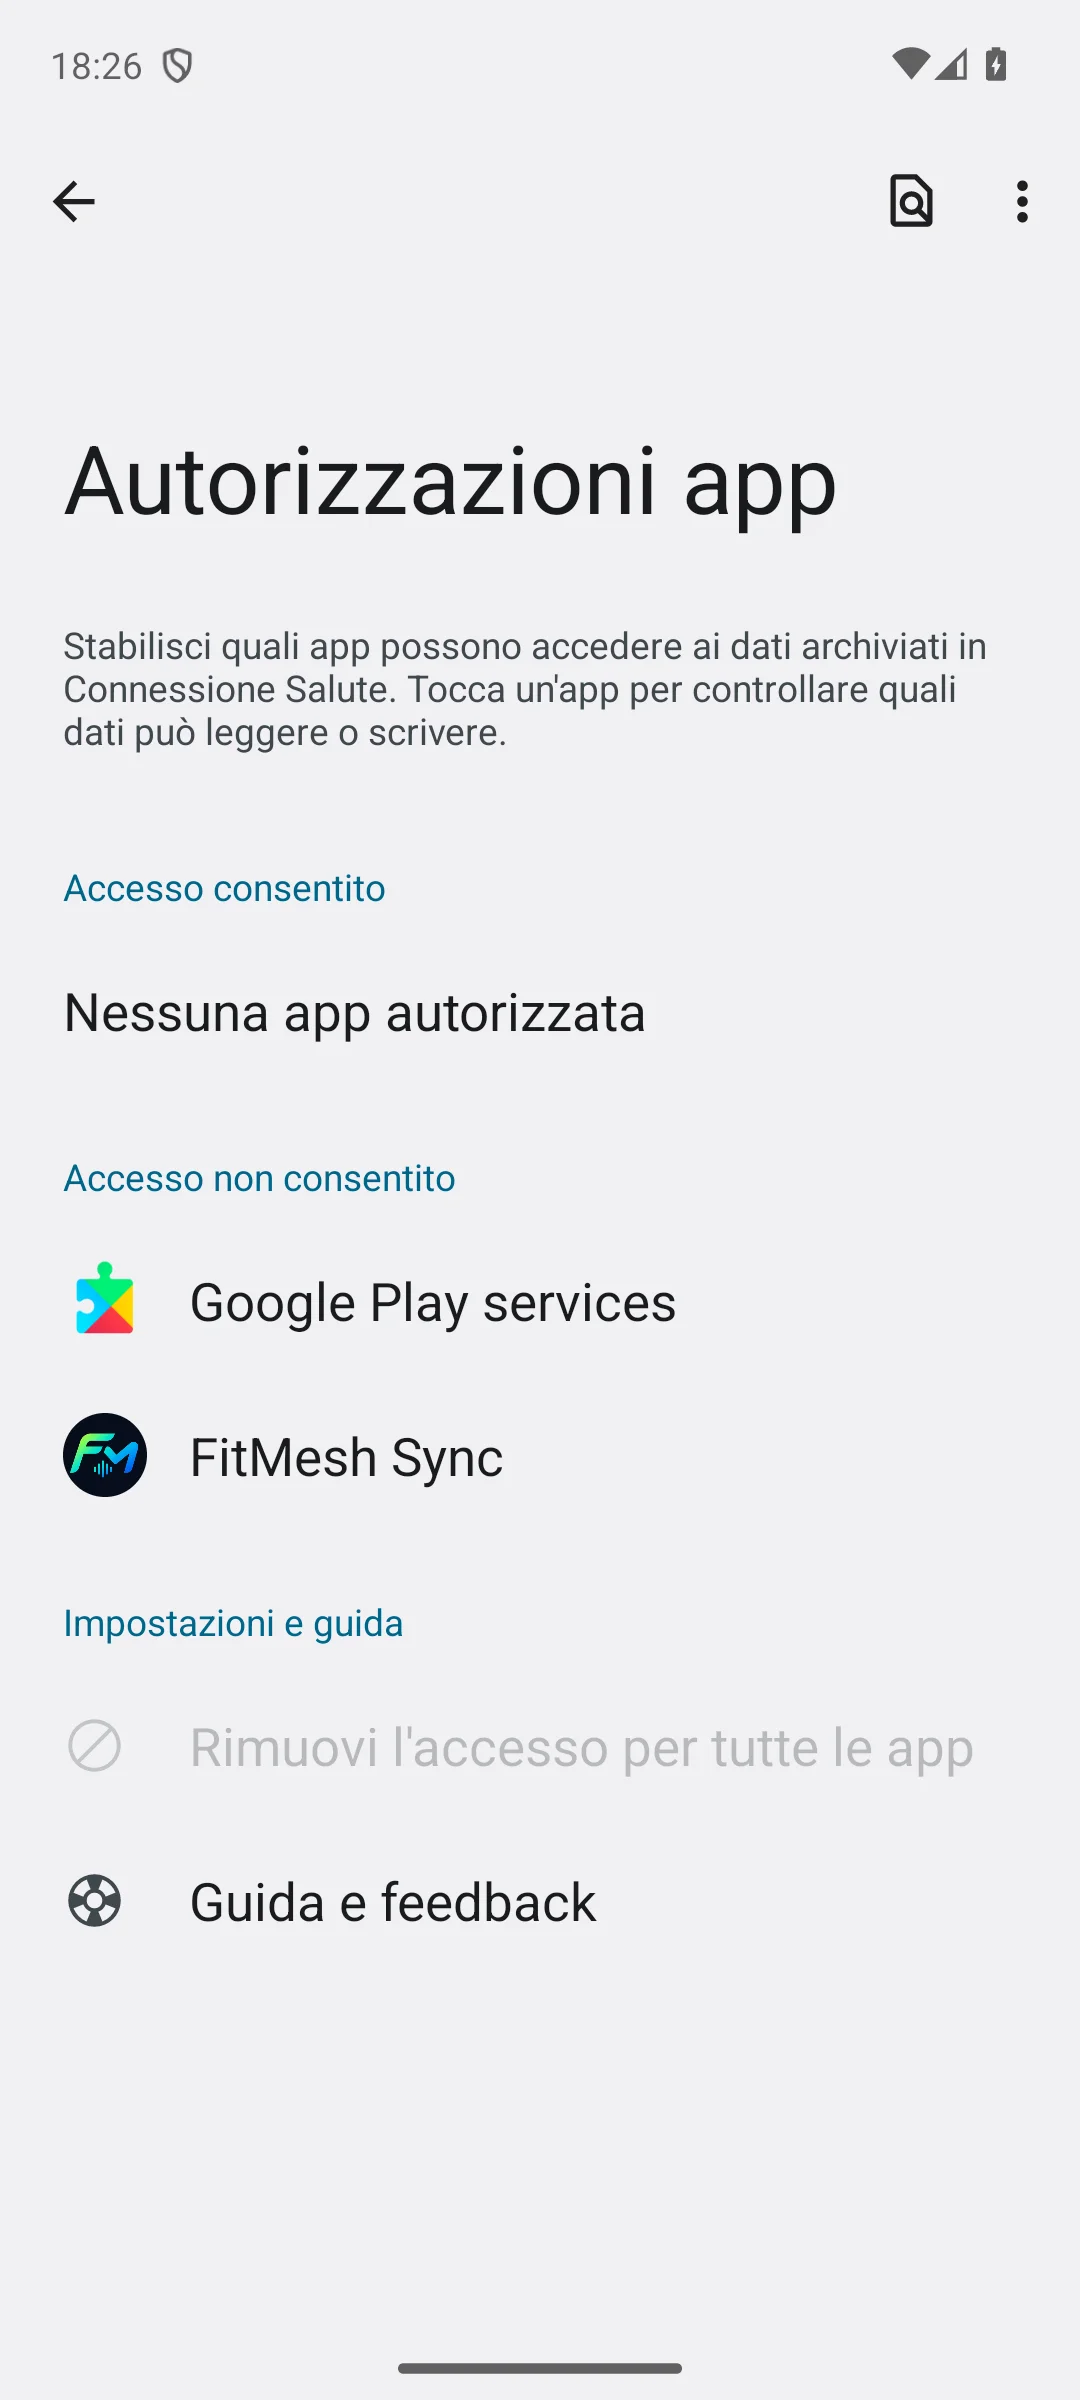
Health Connect app permissions list showing FitMesh Sync under Not allowed section
App permissions list showing FitMesh Sync in the initial unauthorized state. (Italian interface: «Accesso non consentito»).
What to check if something goes wrong:If FitMesh Sync is not visible in the list, open the FitMesh Sync app, sign in to your account, and complete initial launch setup.

5. Configure read permissions for FitMesh Sync

Action: Review and toggle on the read permissions for the metrics you wish to track (e.g., Steps, Resting heart rate, Sleep, Total calories burned, Distance, Exercise), or turn on Allow all («Consenti tutte»).

Expected result: The selected metric toggles turn on. For the smartwatch reading path described in this guide, FitMesh Sync operates by reading records stored in Health Connect. (Optional write permissions declared in the manifest are only used for opt-in write-back features).
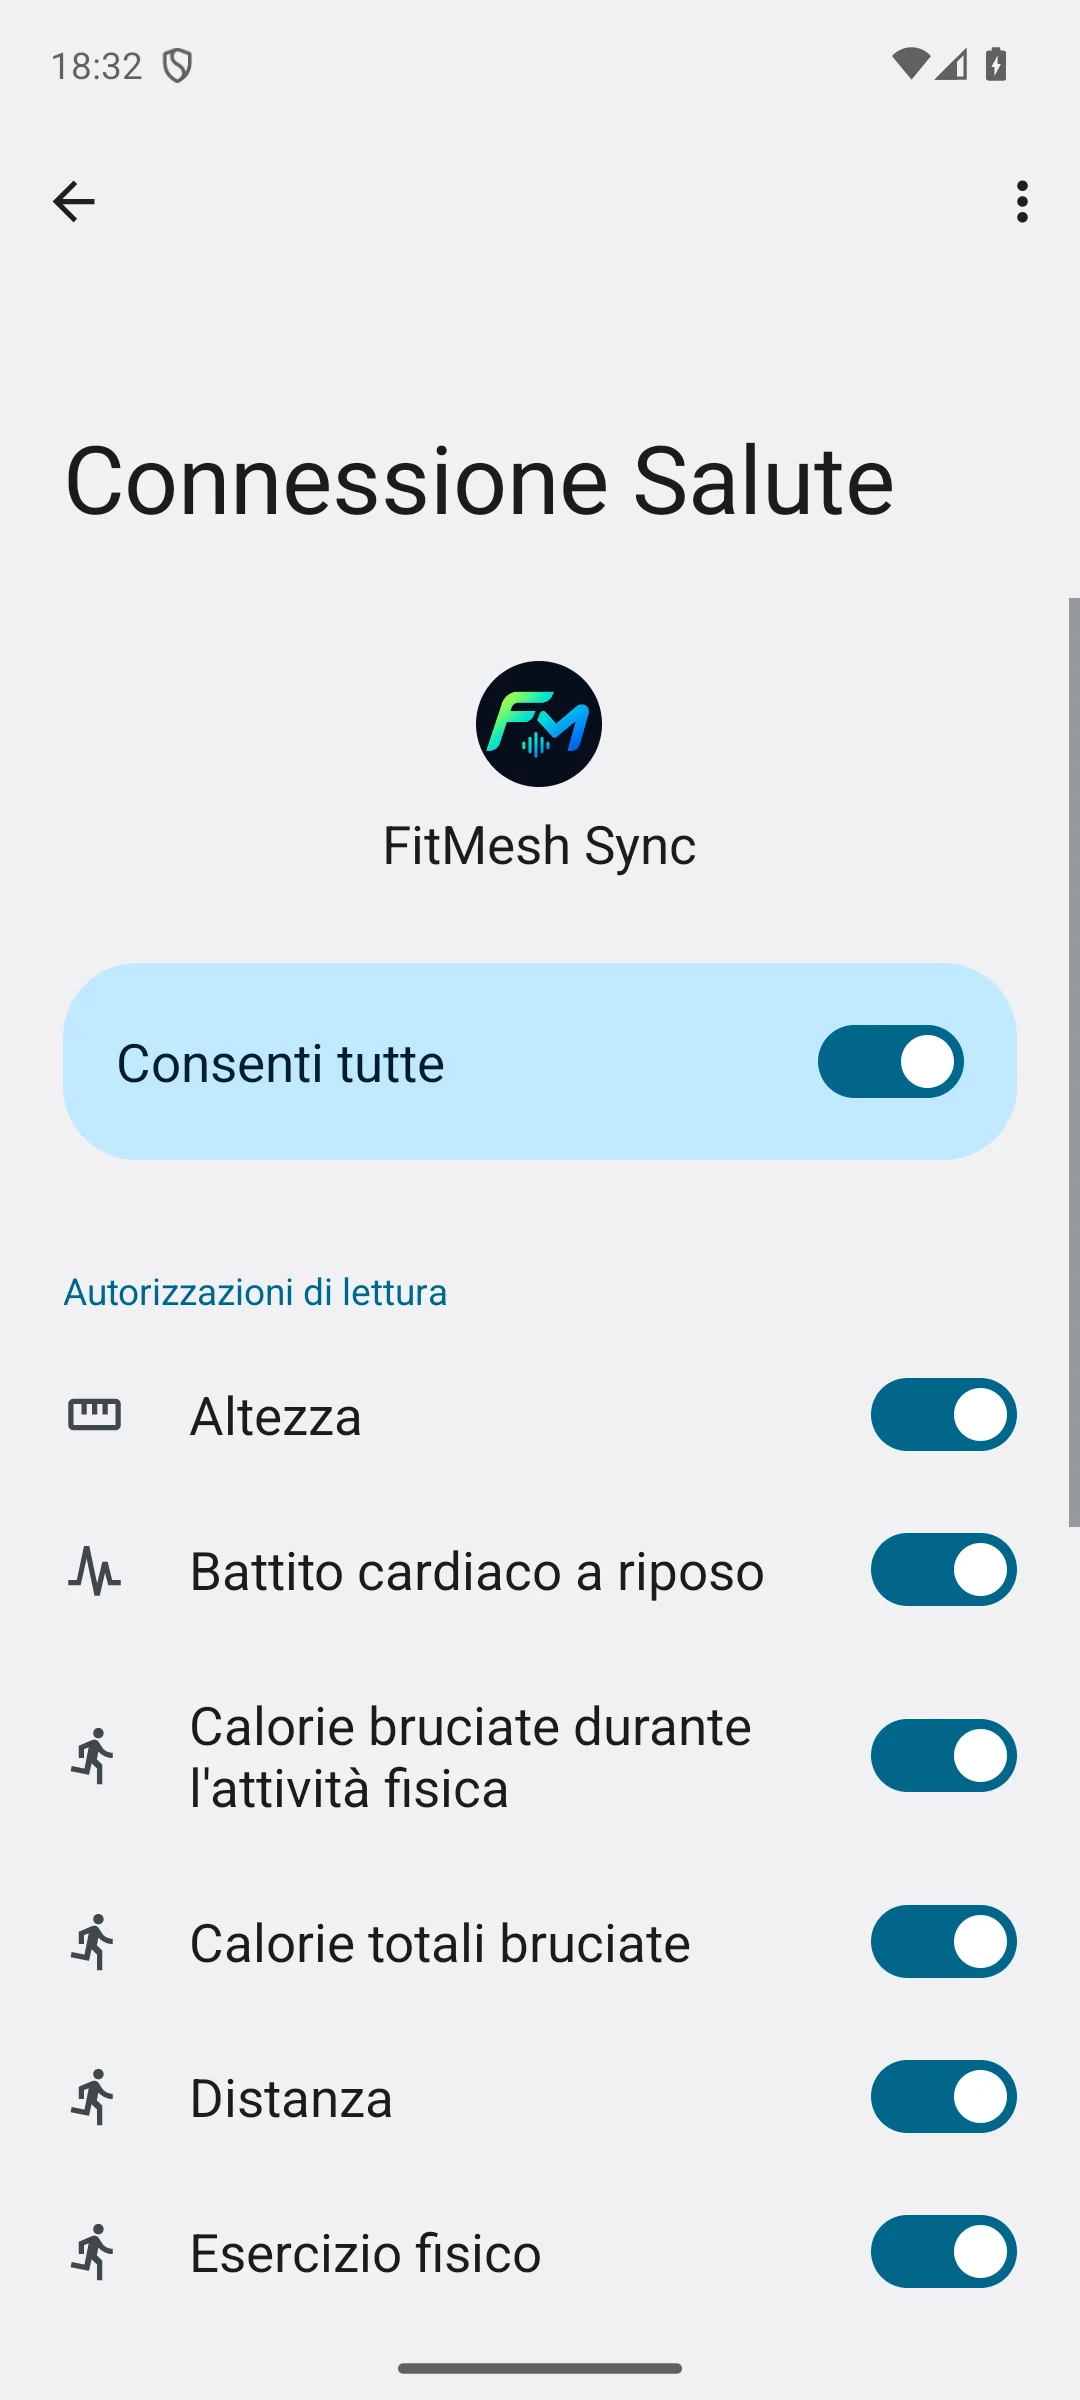
FitMesh Sync permissions screen in Health Connect with Allow all and read permissions toggled on
Read permissions screen with active toggles. (Italian interface: «Consenti tutte» / «Autorizzazioni di lettura»).
What to check if something goes wrong:If you leave a specific metric disabled (such as sleep or heart rate), FitMesh Sync cannot retrieve new readings for that category from Health Connect. This does not mean the corresponding card will necessarily be empty: previously synced historical records, demo data, or inputs from other sources may still be shown.

6. Open FitMesh Sync and start a sync attempt

Action: Open the FitMesh Sync app. On the home dashboard, locate the Synchronization card and tap the Sync now («Sincronizza ora») button to request data from Health Connect.

Expected result: The app queries the local Health Connect APIs to import available metrics. The button temporarily disables during the operation.
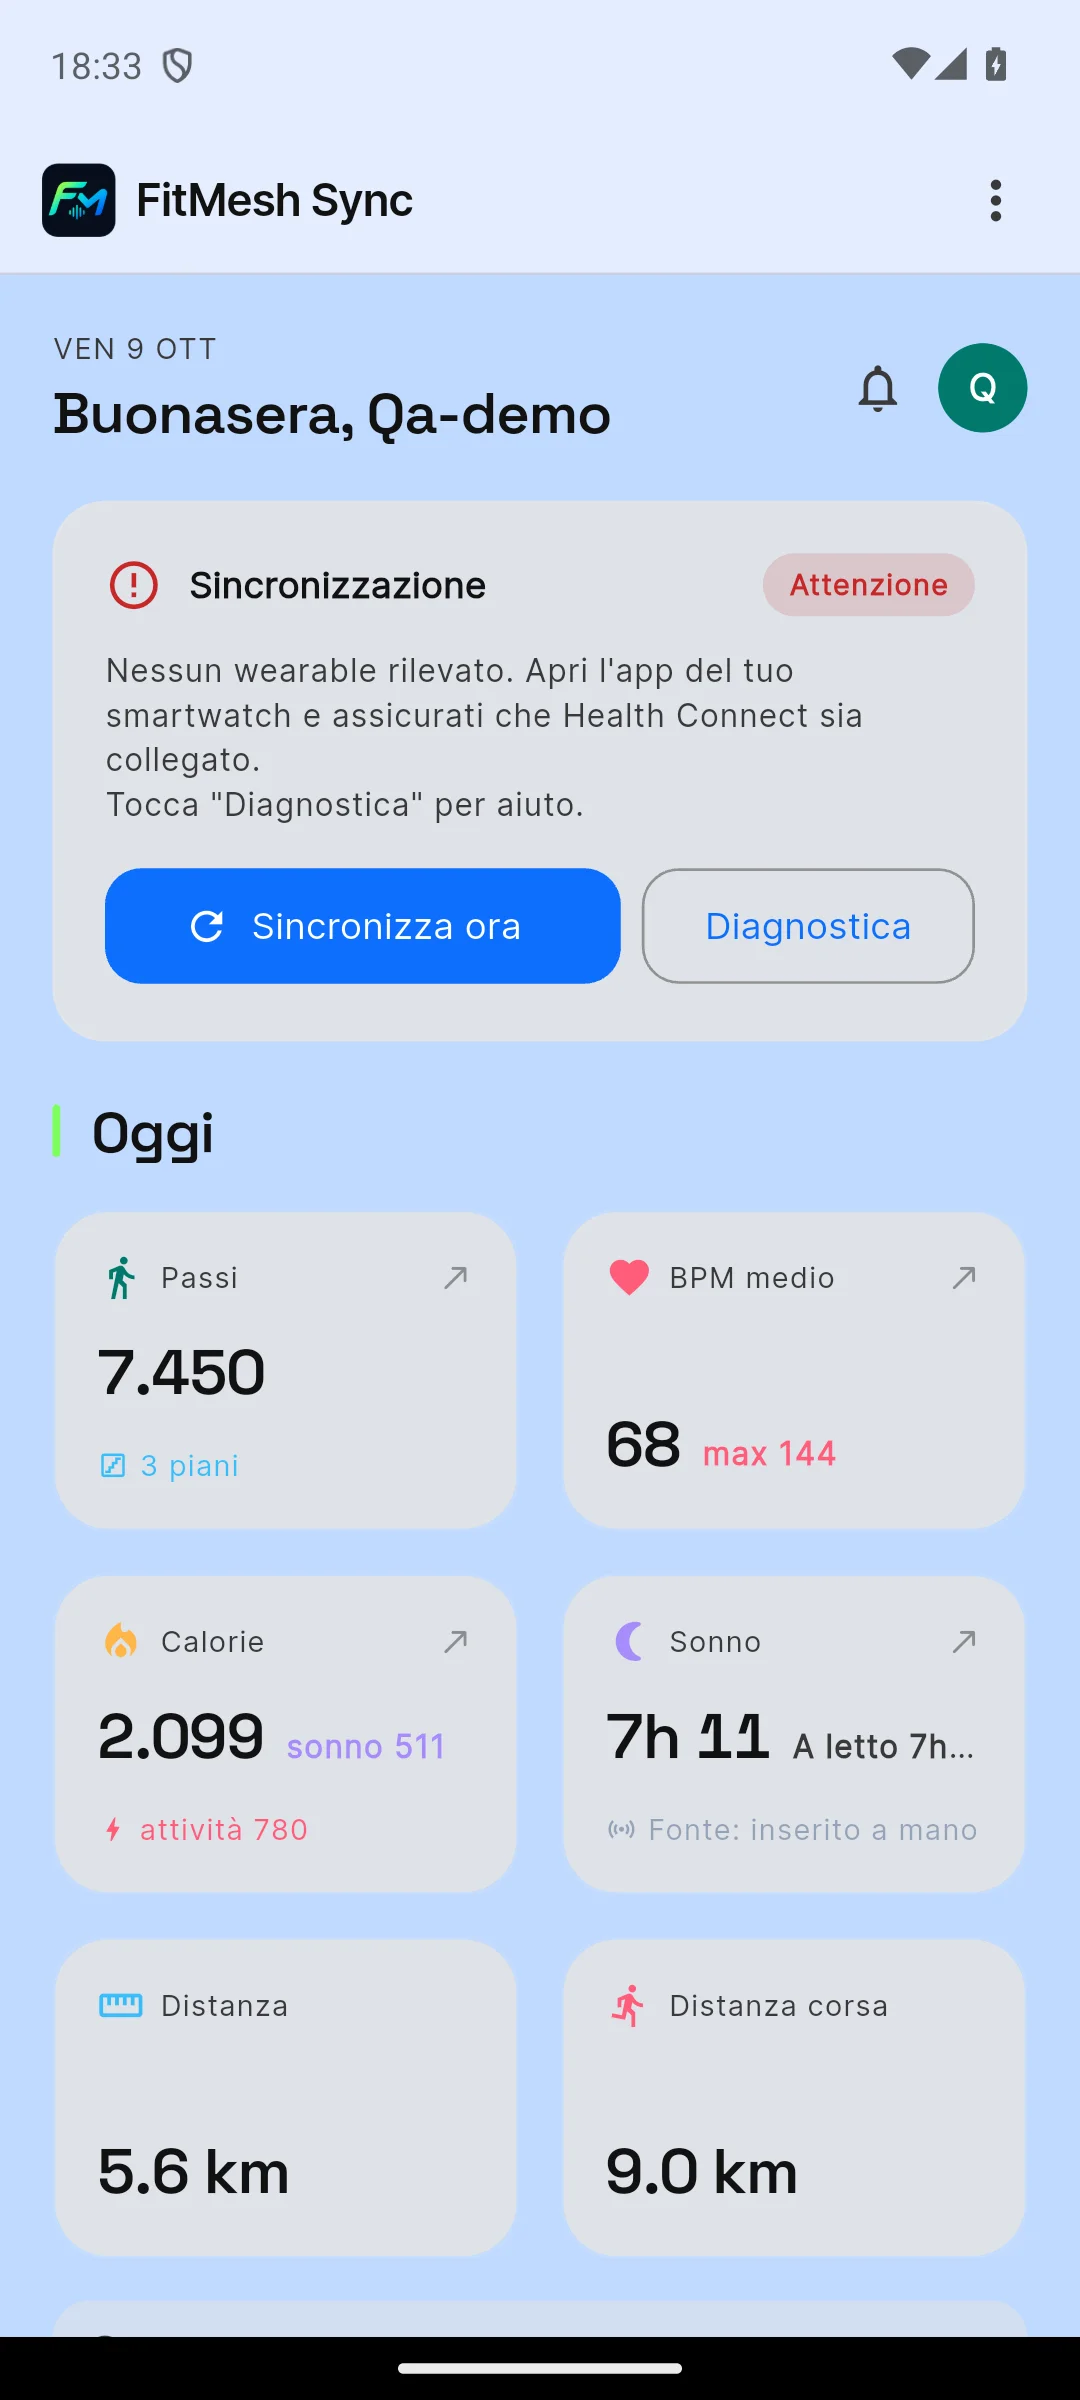
FitMesh Sync dashboard with No wearable detected warning banner
Displayed numbers (e.g., 7,450 steps) are pre-loaded synthetic fixture data, not an import from Health Connect. The «Nessun wearable rilevato» notice indicates the sync cycle did not retrieve valid records, whether due to absent source data, missing permissions, or a transient read error.
What to check if something goes wrong:If the warning «No wearable detected» («Attenzione: Nessun wearable rilevato») appears, the sync cycle did not retrieve valid records. This can stem from multiple causes: your companion app has not stored records in Health Connect yet, relevant read permissions are disabled, or a transient API read error occurred.

7. Inspect status in the Sync Center (Diagnostics)

Action: In the Synchronization card, tap Diagnostics («Diagnostica») to open the detailed Sync Center screen («Centro Sincronizzazione»).

Expected result: You see the Sync Center with metric-by-metric source information.
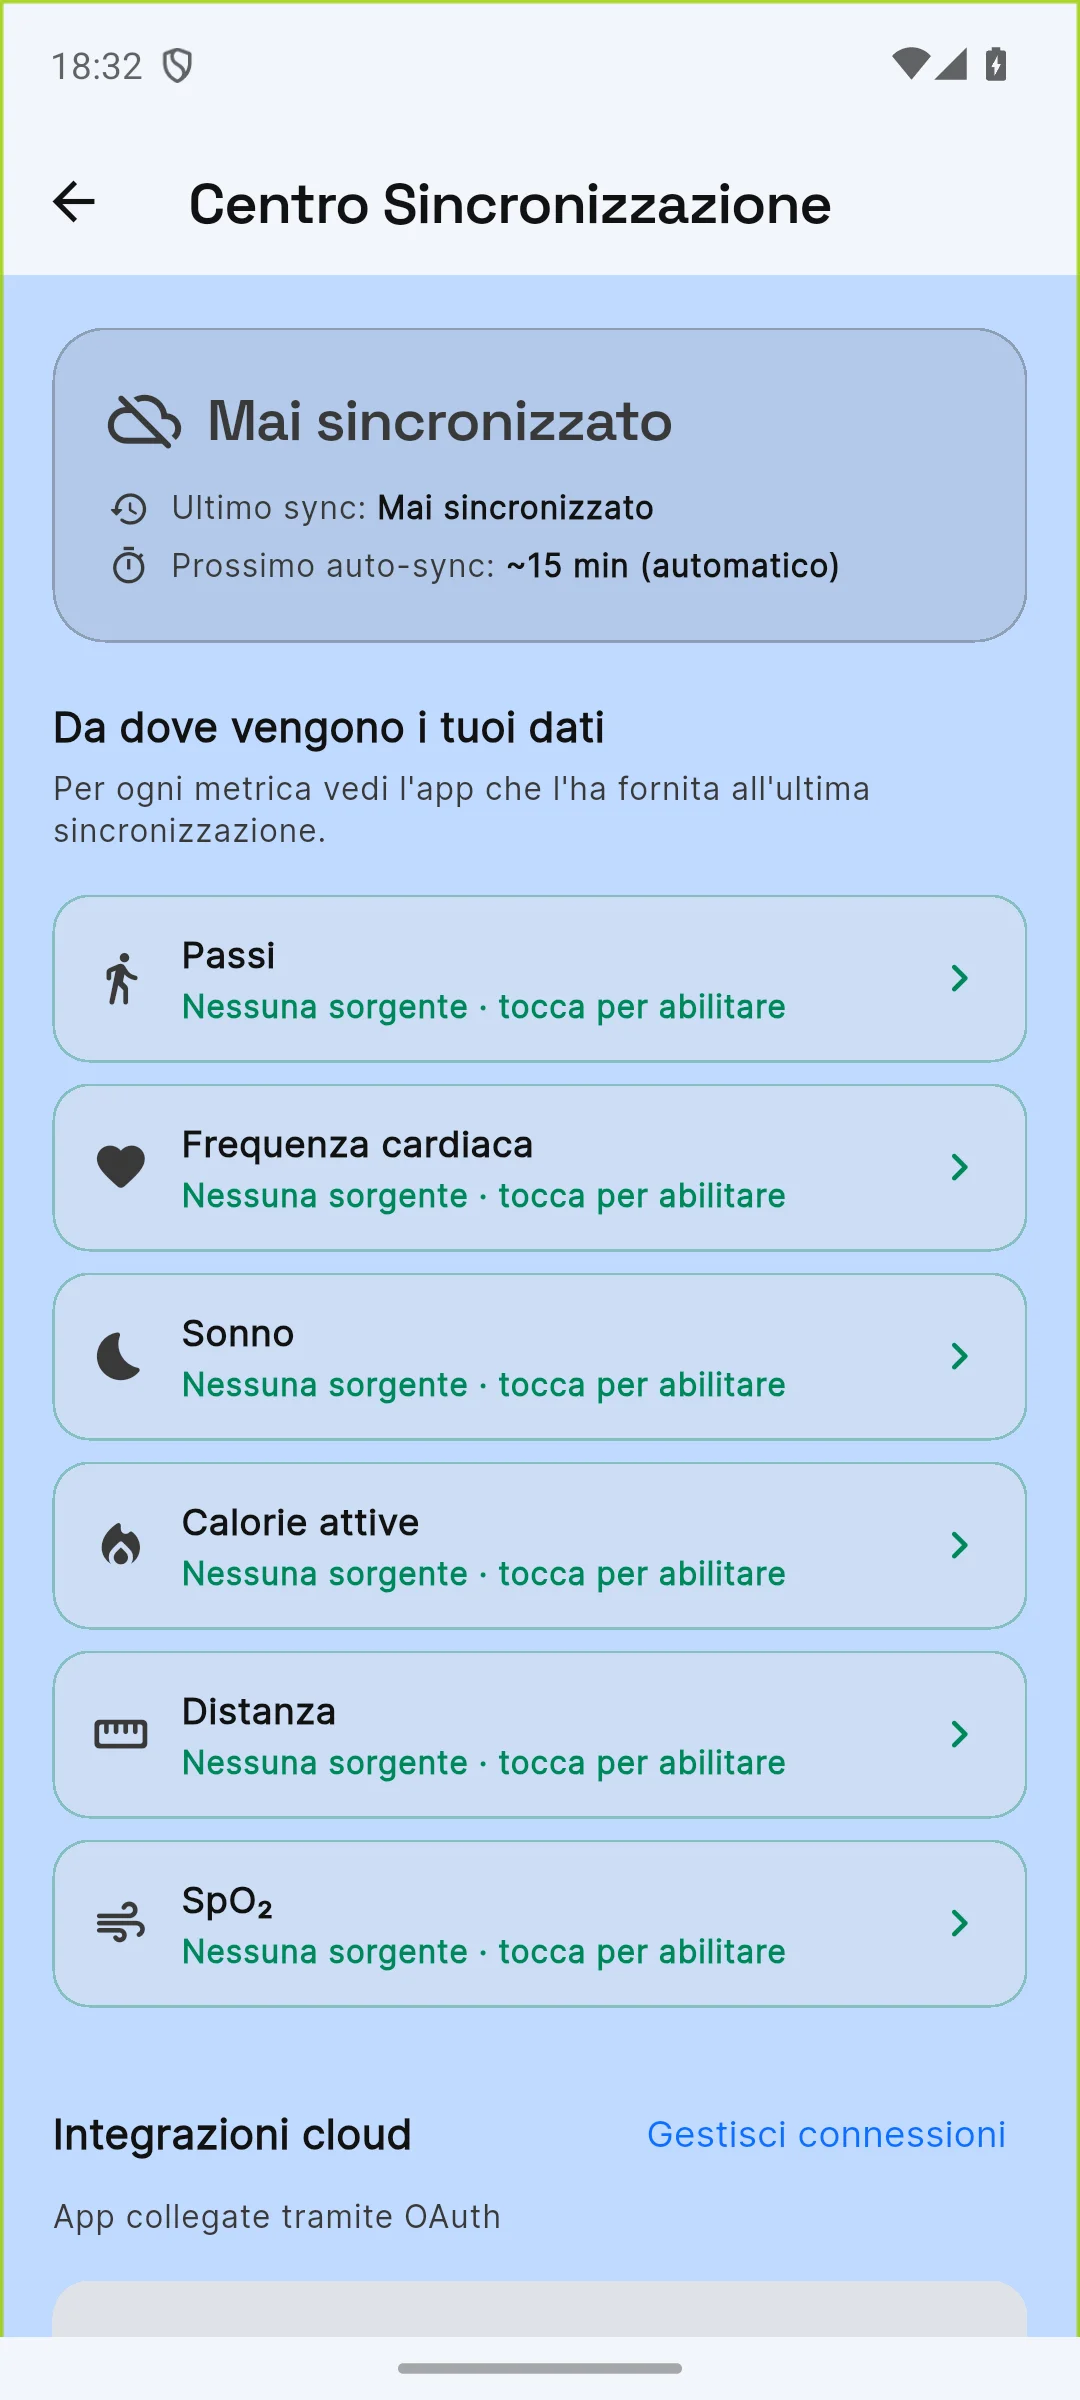
Sync Center screen showing Never synced and No source labels for health metrics
Sync Center: «Mai sincronizzato» (Never synced) and «Nessuna sorgente» (No source) reflect the app's current internal state (no valid read recorded by FitMesh), not a successful sync outcome. They do not prove Health Connect itself is empty: check source records and permissions separately.
What to check if something goes wrong:The labels «Never synced» («Mai sincronizzato») and «No source» («Nessuna sorgente») describe the status known to FitMesh Sync for each metric, indicating the app has not yet completed a read from a valid source, rather than a successful sync outcome. They do not prove Health Connect itself is empty: verify separately that Health Connect contains records from your companion app and that read permissions granted to FitMesh Sync are active.

8. (Optional) Battery management and background syncing

Action: Under Android Settings > Apps > FitMesh Sync > App battery usage, you may select Unrestricted («Senza limitazioni») to reduce system battery saver constraints.

Expected result: The battery usage radio button switches to «Unrestricted» («Senza limitazioni»).
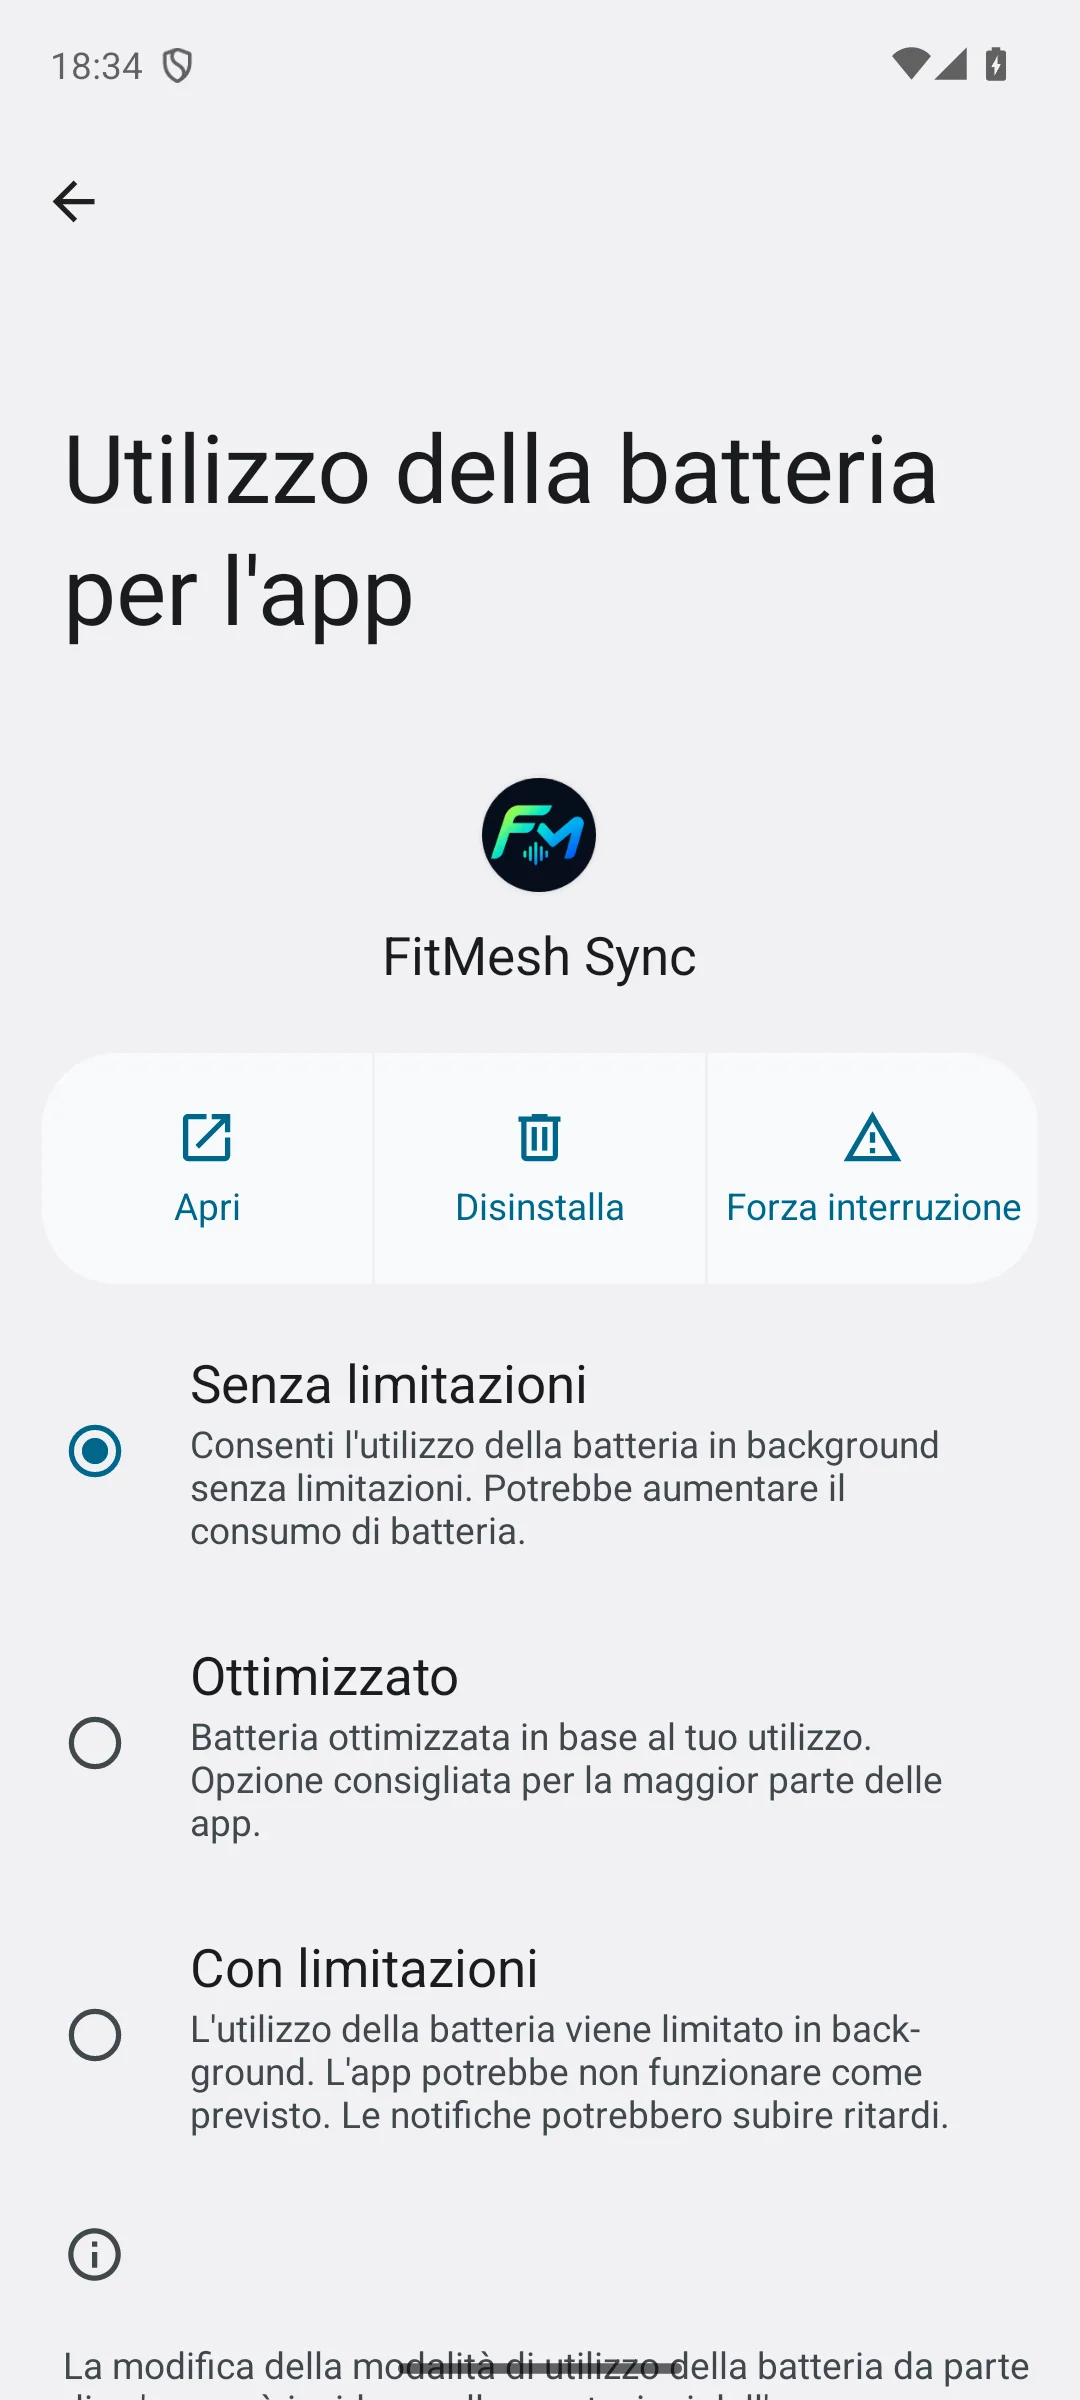
Android App battery usage settings screen with Unrestricted option selected
App battery usage screen with the «Senza limitazioni» (Unrestricted) option selected.
What to check if something goes wrong:This step is optional. Battery settings alone do not guarantee automatic background sync: background execution also depends on the Health Connect background read permission, the Health Connect platform version, and vendor Doze policies. A manual sync attempt with «Sincronizza ora» can always be initiated at any time even under the default «Optimized» profile.

Quick troubleshooting guide

1. Missing source data

If Health Connect has no records, FitMesh has no readings to import. Open your watch companion app and trigger a sync from the device to the phone first.

2. Missing read permissions

If source records exist but FitMesh does not record new updates for that metric, check Health Connect > App permissions > FitMesh Sync and verify that relevant read permissions are enabled. A disabled permission prevents new reads, while remaining values may reflect demo data or earlier syncs.

3. Background updates

Battery savers can defer automatic background sync. You can start a foreground sync attempt anytime by opening FitMesh and tapping «Sync now».

Still have questions about your setup?